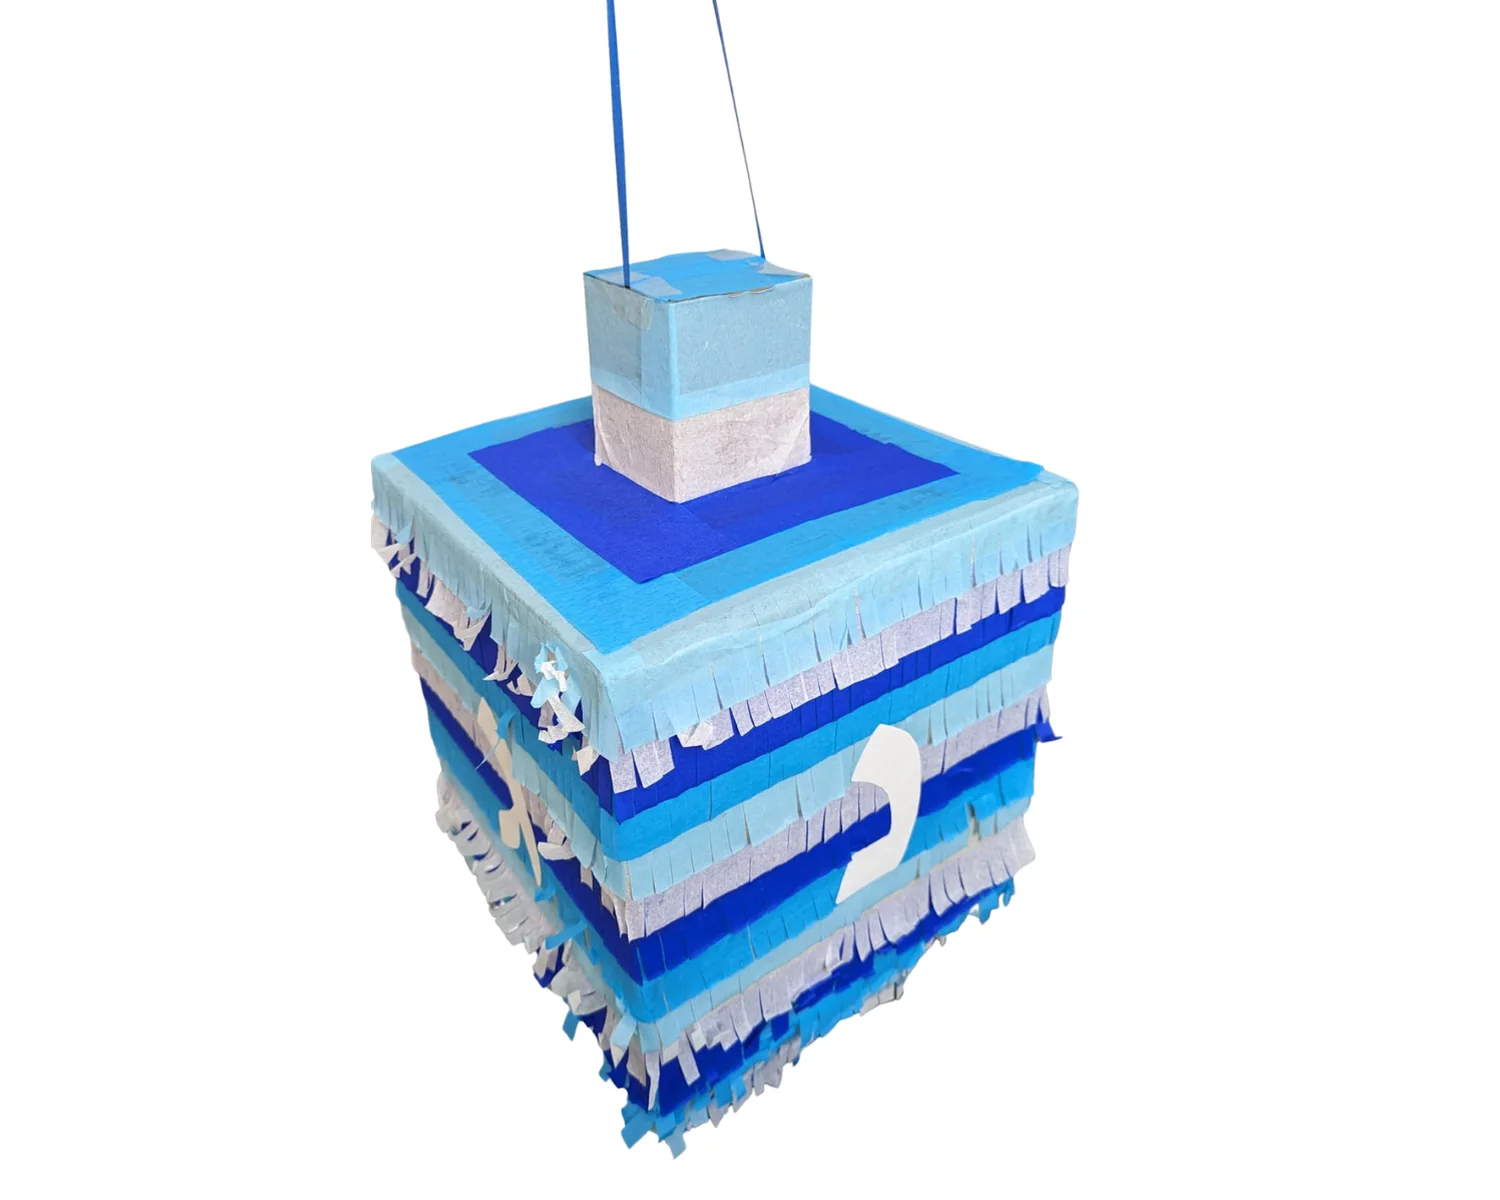
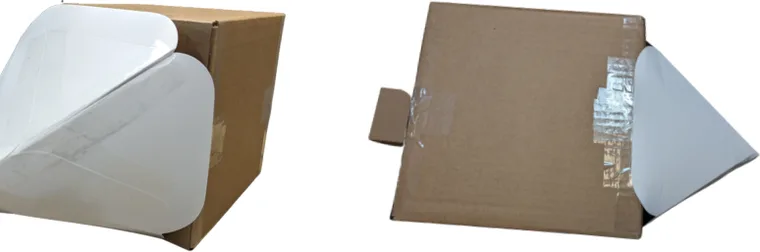
The dreidel body. Any sturdy 10 × 10 × 10 inch box works, so check the recycling first.
Small Kraft Tuck Boxes
The dreidel handle on top. You need one 3 × 3 × 4 inch box with a tuck flap.
White Paperboard Wedge Plates
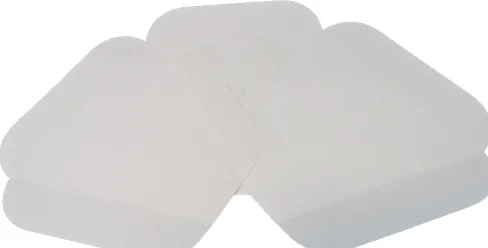
Four of these triangles make the dreidel point (steps 9 to 14). Pack of 50.
Blue Crepe Paper Streamers
Eight rolls in blues and white, enough fringe for the body, the point and the handle.
Glue Sticks
For pressing the fringed strips onto the box.
Packing Tape Strips
Pre-cut 2 × 6 inch strips, no dispenser needed. They hold the box, the handle and the point together, so use plenty.
Royal Blue Satin Ribbon
The hanging string, threaded through the box and tied in a double knot.
Clear Adhesive Hooks
To hang the finished piñata from a ceiling or door frame.
10-Inch Cardboard Boxes
10 × 10 × 10 in. box
Small Kraft Tuck Boxes
3 × 3 × 4 in. handle box
White Paperboard Wedge Plates
For the dreidel point
Blue Crepe Paper Streamers
8 rolls, blues and white
Glue Sticks
4 glue sticks
Packing Tape Strips
50 pre-cut strips
Royal Blue Satin Ribbon
Hanging ribbon
Clear Adhesive Hooks
To hang it up
Instructions
24 steps, a photo for each.
Build the box first, then the point, then cover everything in fringed crepe paper.
Part 1 · Build the dreidel body
1
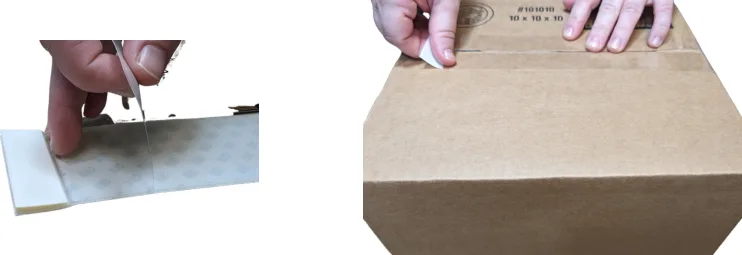
Assemble the cardboard box and tape one end shut using the tape strips.
2
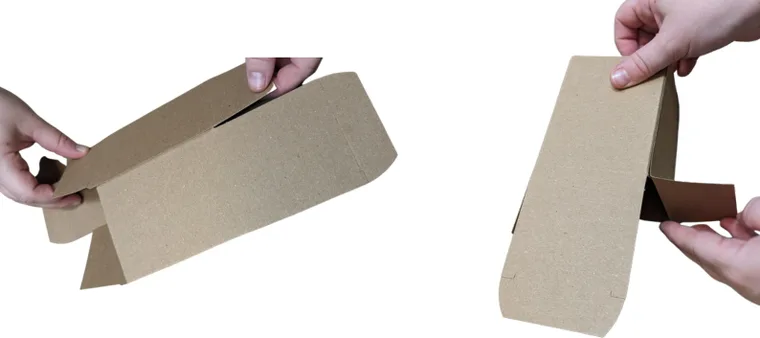
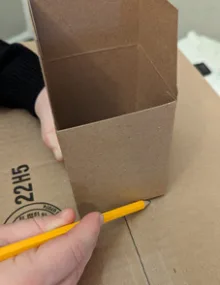
Assemble the small kraft box, leaving the top side open.
3
Use the closed end of the kraft box to trace a square at the center of the sealed side of the large box
4
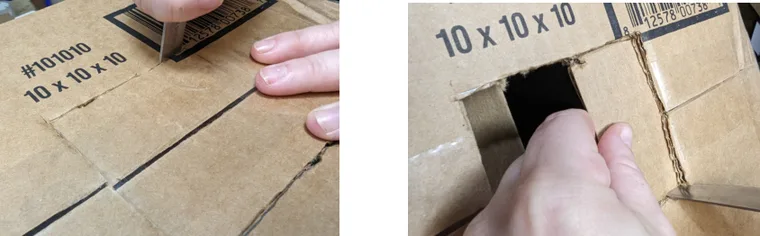
Using a sharp scissor, knife or razor blade, cut out the square. Make sure to cut the inner flaps as well.Grown-up step
5
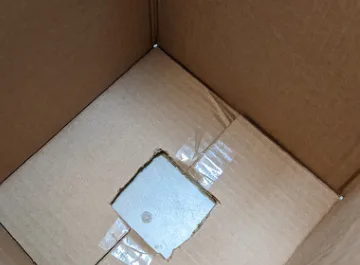
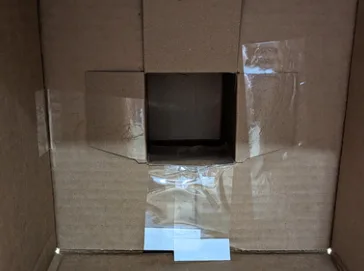
Tape all four sides of the square so the inner flaps are secured and don’t hang loose.
6
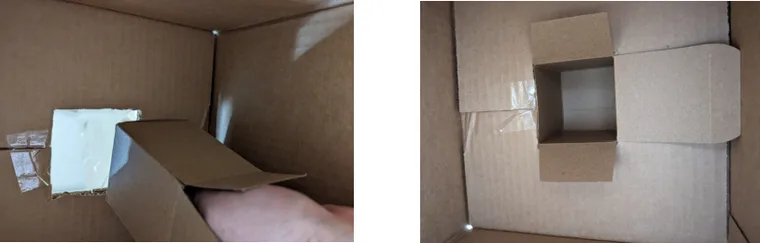
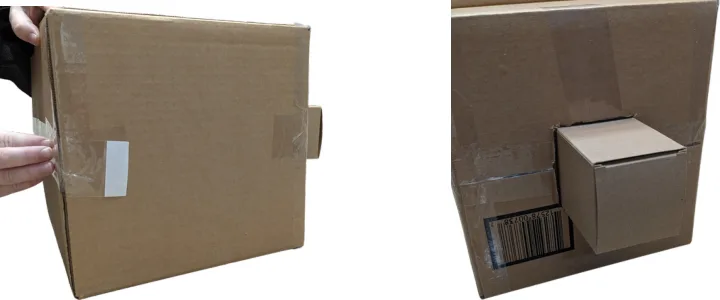
Insert the assembled kraft box through the square hole. Push until only the cover flaps remain inside the box.
7
Secure the “dreidel handle”, aka the kraft box, to the inside of the box.
8
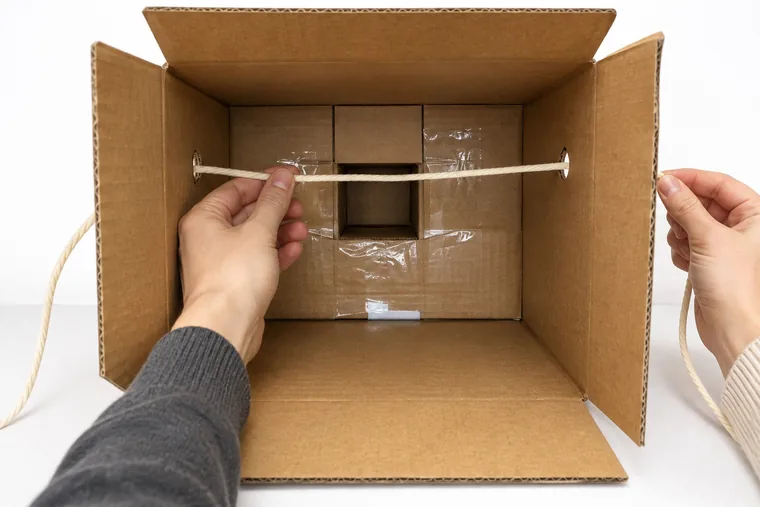
Poke two holes near the top of the large box, one on the left side and one on the right. Cut a piece of string long enough to pass through the box, with plenty left on both sides for hanging. Thread the string in through one hole, across the inside of the box, and out through the opposite hole. Tie the two ends together with a strong double knot to create a hanging loop.
9
Now you can seal up the other side of the dreidel body.
Part 2 · Make the point
Steps 10 to 15 use four of the white paperboard wedge plates from the supply list.
10
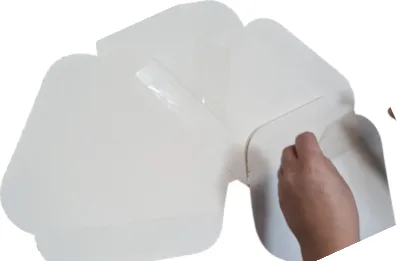
Lay out 3 of the white cardstock triangles so there is a perfect triangle formed at the center. Tape them together.
11
Add the fourth triangle, positioning it so it forms a straight line with the first triangle.
12
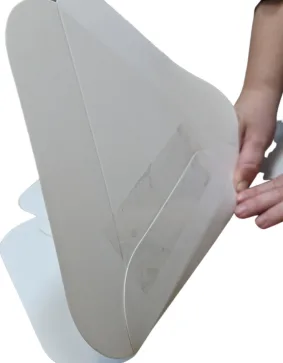
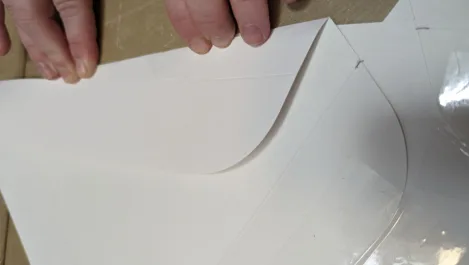
Fold over the first triangle, NOT on the fold line. Repeat with the next two triangles.
13
Sharply fold in the two ends as shown.
14
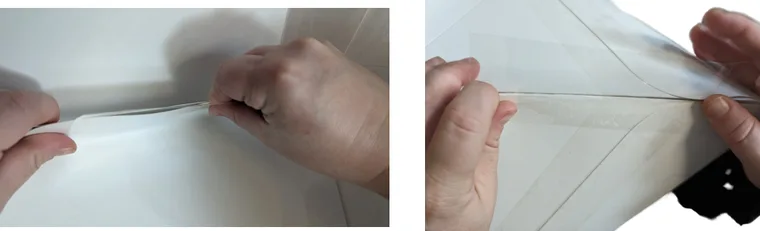
Bring the edges together and tape it securely, both inside and outside.
15
Tape the triangle to the bottom of the box.
Part 3 · Decorate
16
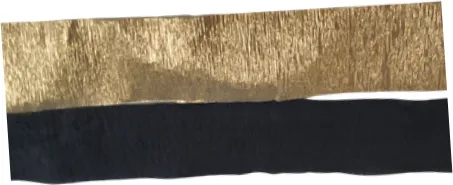
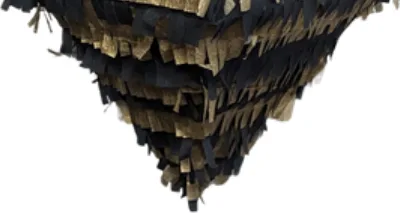
Now it’s decorating time! Cut a few small strips of crepe paper that can fit around the dreidel point. The first should be 3 inches long, the next 4 inches, etc.
17
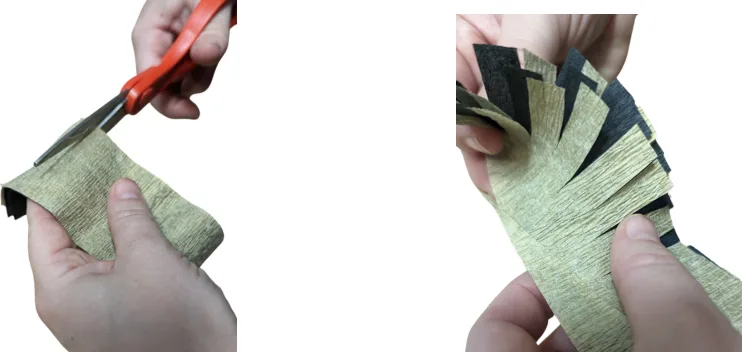
Fringe the strips, up to 4 at a time. Each fringe should be about 1 cm wide.
18
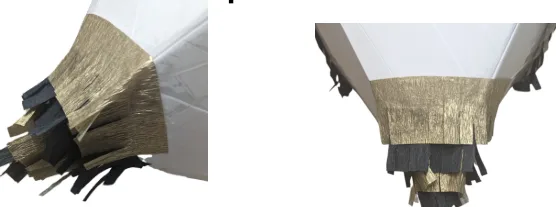
Use a glue stick to smear glue onto the dreidel point and carefully press the fringed paper onto it. Layer it so the fringes of the top strip always cover the non-fringed part of the strip underneath.
19
When turning the strip to the next side of the dreidel, make sure to keep it straight and aligned with the other side so the strips don’t look crooked.
20
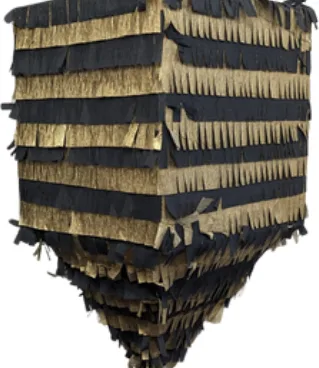
Now cut 10-12 strips of crepe paper to go around the dreidel body. Each one should be 40 inches long. Fringe them.
21
Repeat steps 18 and 19 until the entire dreidel body is covered with crepe paper.
22
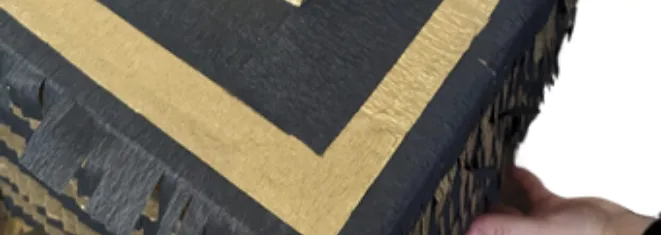
For the top of the dreidel, cut 4 strips of crepe paper ten inches long, and 4 strips in another color 8 inches long. Glue them onto the top of the dreidel.
23
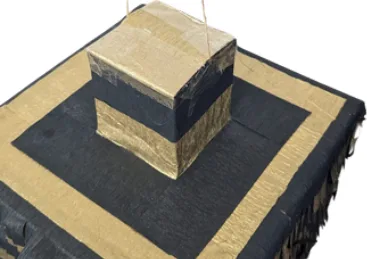
Cut two 12-inch strips in alternating colors to wrap around the dreidel handle. Glue them on. Use 2 strips, 5 inches long, to cover the top of the handle.
Part 4 · Hang it up
24
After you fill the pinata, seal the cover flap closed with lots of tape. Use an adhesive hook to hang the pinata up.
How to make it
Part 1 · Build the dreidel body
1
Assemble the cardboard box and tape one end shut using the tape strips.
2
Assemble the small kraft box, leaving the top side open.
3
Use the closed end of the kraft box to trace a square at the center of the sealed side of the large box
4
Using a sharp scissor, knife or razor blade, cut out the square. Make sure to cut the inner flaps as well.Grown-up step
5
Tape all four sides of the square so the inner flaps are secured and don’t hang loose.
6
Insert the assembled kraft box through the square hole. Push until only the cover flaps remain inside the box.
7
Secure the “dreidel handle”, aka the kraft box, to the inside of the box.
8
Poke two holes near the top of the large box, one on the left side and one on the right. Cut a piece of string long enough to pass through the box, with plenty left on both sides for hanging. Thread the string in through one hole, across the inside of the box, and out through the opposite hole. Tie the two ends together with a strong double knot to create a hanging loop.
9
Now you can seal up the other side of the dreidel body.
Part 2 · Make the point
Steps 10 to 15 use four of the white paperboard wedge plates from the supply list.
10
Lay out 3 of the white cardstock triangles so there is a perfect triangle formed at the center. Tape them together.
11
Add the fourth triangle, positioning it so it forms a straight line with the first triangle.
12
Fold over the first triangle, NOT on the fold line. Repeat with the next two triangles.
13
Sharply fold in the two ends as shown.
14
Bring the edges together and tape it securely, both inside and outside.
15
Tape the triangle to the bottom of the box.
Part 3 · Decorate
16
Now it’s decorating time! Cut a few small strips of crepe paper that can fit around the dreidel point. The first should be 3 inches long, the next 4 inches, etc.
17
Fringe the strips, up to 4 at a time. Each fringe should be about 1 cm wide.
18
Use a glue stick to smear glue onto the dreidel point and carefully press the fringed paper onto it. Layer it so the fringes of the top strip always cover the non-fringed part of the strip underneath.
19
When turning the strip to the next side of the dreidel, make sure to keep it straight and aligned with the other side so the strips don’t look crooked.
20
Now cut 10-12 strips of crepe paper to go around the dreidel body. Each one should be 40 inches long. Fringe them.
21
Repeat steps 18 and 19 until the entire dreidel body is covered with crepe paper.
22
For the top of the dreidel, cut 4 strips of crepe paper ten inches long, and 4 strips in another color 8 inches long. Glue them onto the top of the dreidel.
23
Cut two 12-inch strips in alternating colors to wrap around the dreidel handle. Glue them on. Use 2 strips, 5 inches long, to cover the top of the handle.
Part 4 · Hang it up
24
After you fill the pinata, seal the cover flap closed with lots of tape. Use an adhesive hook to hang the pinata up.
Grown-up guide
The practical bits
What else do you need?
Scissors or a craft knife, a pencil and a ruler for measuring the crepe paper. Then wrapped candy, chocolate gelt or small toys to fill it.
Ages
6+
Kids fringe and glue the crepe paper; a grown-up cuts the box with the knife.
Time
2–3 hours
Most of it is fringing and gluing, so it splits well over two afternoons.
How do you hang it?
Stick the adhesive hook to a ceiling or door frame and hang the string loop on it. Fill the piñata through the handle before you tape it shut.
We put together a fabulous selection of prizes you can use to fill your pinata! Find them here
✦
A dreidel you made yourselves, full of treats for everyone.