Hanukkah/Menorah Tray Table Hanukkah Craft
Craft No. 04

Menorah Tray Table Hanukkah Craft

Enjoy menorah lighting time this year like never before by using a table YOU built. It's easier than you think.

DIY Wooden menorah tray
The It's Yom Tov boy
✦
The It's Yom Tov girl
✦
Let’s make one!
What you need

Eight supplies, one sturdy table.

What you need

Get everything in one go
One tap adds all 8 supplies to your Amazon cart.
Three blank wood panels, stacked
Wooden Tray
A pack of three cradled wood panels, 8 by 12 inches; one becomes the tray top your menorah sits on.
Can of water-based antique pine wood stain
Wood Stain
A fast-drying, water-based stain in Antique Pine that turns the raw wood a warm brown.
Two long unfinished hardwood dowel rods
Wooden Dowels
Two 36 inch hardwood dowels, cut down to become the four legs of the table.
Two stain applicator sponges
Applicator Pads
Two foam sponges made for wiping stain onto the tray and the dowels without streaks.
Can of clear satin polycrylic wood finish
Polycrilic Finish
A clear satin finish that seals in the stain and protects the tray and dowels.
Roll of clear double-sided mounting tape
Gorilla Mounting Tape
A roll of clear double-sided tape that gives the finished table extra hold where the legs meet the tray.
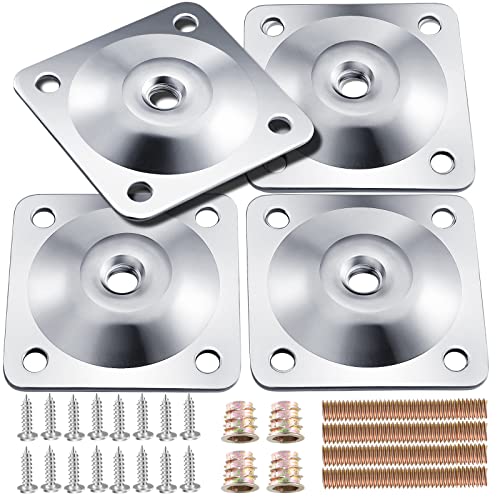
Four flat leg mounting plates with hanger bolts
Leg Mounting Sets
Four flat mounting plates with hanger bolts; one goes on each corner of the tray and a dowel screws onto it.
Set of four white rubber chair leg tips
Rubber Leg Caps
Four slip-on rubber caps for the bottom of each leg, so the table grips and will not scratch the surface it stands on.
Three blank wood panels, stacked
Wooden Tray
The tray top
Can of water-based antique pine wood stain
Wood Stain
Antique pine brown
Two long unfinished hardwood dowel rods
Wooden Dowels
The four legs
Two stain applicator sponges
Applicator Pads
Streak-free staining
Can of clear satin polycrylic wood finish
Polycrilic Finish
Seals the stain
Roll of clear double-sided mounting tape
Gorilla Mounting Tape
Extra hold
Four flat leg mounting plates with hanger bolts
Leg Mounting Sets
Corner plates and bolts
Set of four white rubber chair leg tips
Rubber Leg Caps
Non-slip feet
Instructions

Six steps, one table.

Stain and seal the wood first, then drill and attach the legs once everything is dry.
The It's Yom Tov boy waving
1
Stain the wooden tray and four dowels with applicator pads. You can choose what shade of brown to stain with, and how thickly to lay on the stain.
2
Let the stain dry.
3
Coat the tray and dowels with a finish to seal in the color and protect the wood.
4
Drill a single hole into the center of one end of each dowel. Ask an adult for help!
Grown-ups only
5
Attach one leg mounting set to each corner of the tray, excluding the center screw as that would poke through the thinner would of the tray.
6
Screw a dowel onto each mount using the bolt included in the mounting set.

How to make it

1
Stain the wooden tray and four dowels with applicator pads. You can choose what shade of brown to stain with, and how thickly to lay on the stain.
2
Let the stain dry.
3
Coat the tray and dowels with a finish to seal in the color and protect the wood.
4
Drill a single hole into the center of one end of each dowel. Ask an adult for help!
Grown-ups only for this step!
5
Attach one leg mounting set to each corner of the tray, excluding the center screw as that would poke through the thinner would of the tray.
6
Screw a dowel onto each mount using the bolt included in the mounting set.

Grown-up guide

The practical bits
Why does a grown-up do the drilling?
The dowels are hard wood and need a straight hole in the centre of one end, so a grown-up holds the drill. The staining, sealing and screwing together are all teen work.
Ages
12‑18
Comfortable for tweens with a little help; teens can do nearly all of it themselves.
Time
A weekend
Most of it is waiting for the stain and then the finish to dry.
Can it hold a menorah?
Yes, that is what it is made for. Set it on a firm, level surface, keep lit candles clear of the edges and never leave them burning unattended.
The It's Yom Tov boy
✦
A table you built yourself, ready for the lights.
More crafts→
The It's Yom Tov girl
✦
The It's Yom Tov boyThe It's Yom Tov girl
A table you built yourself, ready for the lights.
More crafts

This site contains affiliate links. If you click on and purchase through these links, we may receive a small commission at no extra cost to you.